O4 - Aint Running Away

Anyone fancy giving us a push?
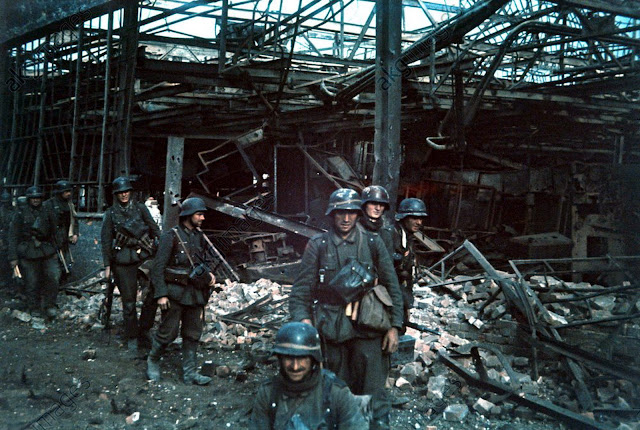
For my next game I started a fast and furious game of O4 ‘Ain’t Running Away’. SS troops with multiple Panthers attacking Anti-tank heavy U.S defenders in the Bulge in 1944. Designed by the late, great Ian Daglish this has lots of nice toys and a very focused board.
The game is also with a new opponent. We are playing this almost as a test game to see if it is worth moving onto campaigns with Hatten first then seeing where we can go…
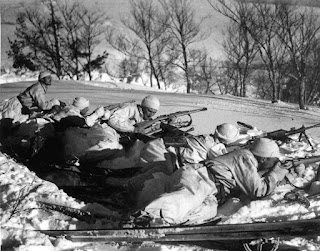
I received the SS Leibstandarte’s attackers and have a strong force. The U.S are defending a village and their main strengths are the terrain, firepower and their many HIP anti-tank options. I doubt I can just run the tanks through unscathed so will need to clear a path with the troops first
Setup
Easy for me as I only have three tanks coming on turn one. These will aim to take overwatch positions to support the primary infantry attack that arrives turn two.

Now there are no less than four hidden AT-guns which have small chances against a Panthers hull and better against the turret and several hidden bazookas as well. My reinforcements for turn two will come rumbling on the bottom edge of the map. I switched one of the panthers up to A1 to try and drive a path through the woods at top as well
This game perfectly encapsulated the old ASL adage of ‘read the scenario card’. I had indeed read it but on reading of the mist hindrance impacted by range I had ‘assumed’ I knew what this meant and my assumption was +1 over 6 hexes and +2 over 12 etc etc. Anyway, the turn started with one of my tanks bogging in the H0 woods and the other two taking overwatch positions. Not a hint of anything from the defence. On my Advance fire phase I tried a couple of shots and that is where the ball dropped. Apparently, this scenario is running a much nastier hindrance. We are not talking mist but thick pea soup like fog!. Every hex shot beyond your own adds +1 hindrances. So, my tanks nicely parked on the hill would have a +7 IFT disadvantage when shooting at a unit in a wooden building 5 hexes away! Plus the halfed for movement and halved for concealment.
This made is apparent that I would need a lot more ‘move’ and a lot less shooty shooty….
Turn two I brought my reinforcements on and generally pushed hard straight for the defenders. After all the fog was neutral and would hinder defensive fire just as badly. It wasn’t my most glorious turn though . I moved a half track with a squad to the left of the map to support my bogged panther against that concealed unit and the other was sent to the right of the map on what I like to turn a ‘suicide scout’. The bogged Panther un-bogged and in a stunning example of not being able to teach a dog new tricks moved to K0 to take up a firing position behind the American positions ( and was a waste of space because of the fog ) it then turned out that the concealed squad nearby had a bazooka and the tank was one shotted to death.

Panther meets Bazooka from the rear
The best thing to occur in turn was me moving a squad and 8-1 leader into the woods at K7 where they failed to ambush but snake eyed their CC roll not only wiping the defenders but also generating another 8-1 leader and moving one hex closer to the outlying stone buildings.
U.S turn two introduced more skulking but not much else. My opponents fire discipline was outstanding – and to be honest considering the mist issue was a good tactical response as you really want to retain that concealment for combat. My most stunning move turn three was malfunctioning one of my Panthers guns trying to get an acquire. In a common stupid move I attempted to fix next turn (why did I bother? Its not like I needed the Main Armament) it broke entirely and the tank was recalled
Turn three I was getting nervous about the clock so went into aggression mode. I sent several squads bumping into concealed units just to see what was there and my suicide halftrack to the exit hex where it revealed one of the hidden anti-tank guns as it exploded into a burning wreck. To the left the half squad with the Bazooka, no doubt buoyed up after having eliminated a panther had advanced next to my motion halftrack with the intention of creating a new barbeque. Stopping was not an option and moving would also get a shot so I tried to overrun them instead and with the passengers merrily joining firepower broke the squad.

The half track at the exit hex is about to be blown up
In the centre I drove one Panther into bypass of N5 and then managed to pin the defenders in M6. This allowed me to advance in two squads and a leader into each. The pinned combat went as expected and the defenders were wiped. The bypass combat ended with a US casualty reduction and melee.
The bottom of the village was now opening up – but I only had two turns to get off. The assault on the central section was messy (I lost a killed 9-1 leader and two broken squads) but revealed the 9-2, full squad and defender and broke them with fire. That is all very well, but I now had one turn to get my troops of and a likely alley of death.

The pressure increases as units move forward to get in play for the last turn
Last advance of the US final turn he advanced a single concealed squad into the exit hex – I have heard before how you can block exit hexes with units that then cannot be dealt with or moved over and how this is a weakness to limited hex exit win conditions so I was expecting it though it was the first time I had seen it.

Lots and lots of Anti-Tank Guns
Still there was still a slight chance. My plan was to use one Panther to absorb defensive fire allowing the other two to hopefully get off board and run over and kill or double break the concealed unit. So I moved to overrun the AT gun and a second AT gun was in hex. Ok I moved on overrun that and broke it, I then overrun the second gun and pinned it, then a third AT gun turned up so I overrun that as well (this was possibly a mistake though as the alternative would be a rear shot I perhaps should have relied on the fog and taken it). Anyway – three AT guns were now not threats. I then moved a second Panther too the exit where first a two hex Bazooka shot missed (and broke) and then the final AT gun appeared. It also missed so I could overrun. This worked and the squad broke. One tank off…

Could this tank commander destroy the pesky half squad in the way?
The next Panther now moved along. It had to overrun and create a morale check that broke again (it was a half squad, so casualty reduction would do) the defender but a high roll meant the defender survived. The tank passed a single extra hex ESB check and moved off.
Next the final tank moved off and here my lack of planning and the scenario card hurt again. Moving through the village mainly in bypass when I had infantry present (doubled cost) meant it could not overrun and only could get off having passed an ESB check of 3.
So three tanks off and 24 VPs exited but the infantry could not move through the broken half squad so game over..I could have done with the recalled tank at that point (which was probably my most stupid error but I am very aggressive when playing).

The demoralised half squad squats on the exit hex
Conclusion
This was a very fun and fast scenario where thinking ahead is really helpful. I should have planned my ranges in a much more efficient fashion to ensure all available tanks could drive off and overrun but failed. Recognising the huge disadvantage, the fog would cause would have also caused me to use the three starter Panthers in a more efficient fashion as well – essentially one Panther and the entire first turn were wasted being destroyed in a location they would not have gone to and taking fire positions where they could not do any damage or see anything…

The victors study a destroyed tank

Comments
Post a Comment