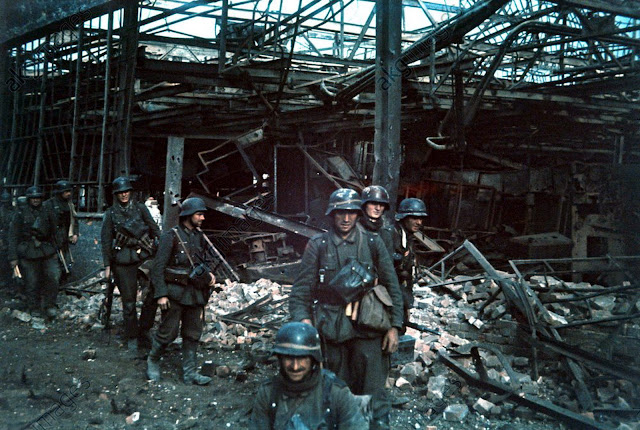
J67 - The lawless roads

Staying early war we now moved to this scenario with a decent British force of the Rifles and the 3rd RTR trying to push through from Calais to Dunkirk. The German blockading force of the 1st Panzer Division will be played by me.
Normally scenario attackers have a large preponderance of force but in numbers the Germans are not far behind the British though the British are well led with no less than four officers and one a particularly scary 9-2. The main attacking advantage lies in the four tanks and two bren carriers that the RTR are packing but the scenario designer was obviously keen to prevent too much tank VBM shenanigans because the Germans have plenty of early war anti-tank capable weapons and there is a restriction on vehicles lost on the Victory Conditions (lose 3 full tanks or both carriers and 2 tanks and it's game over). I suspect part of the reason for the high German infantry numbers is the nasty enclosed terrain as there is very little 'must run half my force across open ground' shenanigans required by the Brits hence more need for parity than the lower numbers of troops such situations normally impose on a defender.
Setup
I don't like the idea of 'allowing' the British to charge across most of their force to the outskirts of the village without risk so have started a forward defence using the concealment counters less to hide locations of anti-tank weapons but more to restrict a lucky prep shot. I fully expect one stack to be ripped to pieces by opportunity fire but allowing they can damage/break one or two squads early then this may be fine.
My two HIP AT Guns are in O4 (bored to just beyond the roadblock in U7) and the other is in M6 bored to P5 (sneaky LOS here, also a location I can see someone trying to go hull down in to threaten the other AT gun)
I have a displayed anti-tank rifle in the North of the map but that flank is much weaker than the other side. The other flank has another anti-tank rifle and the mortar plus a further roadblock in T2 whose main raison d'etre is to provide a shielded rout path back for those troops in the South (I suspect the British can force themselves to the edge of the orchard fast so will be able to interdict otherwise).
The medium machine gun is behind the forward roadblock mainly so it can support the half squad + light machine gun - these are the boys most at risk of breaking turn one (and their rout path is a wood in a 'bad' direction so are very sacrificial). The half squad I can live with, the light machine gun perhaps less so, but they need it to lay their own fire lane to Z10. With the Medium bored to AA10 that could be a potentially painful approach path for the enemy hence one they can predict and thus probably avoid.
Most of my strength is central/south and hopefully can pull back to the main section of the village relatively safely.

The British Setup indicated a strong push in the South of the map with the larger British tanks and a small escort moving over the North and a couple of half squads and the carriers alone in the centre. So 'yea' for stopping an easy approach across open ground. Plus if you look at the following. The target road has been subtly coloured red and both this and the hexes outlined in yellow have to be cleared or all good order Germans.

The actual British attack had tanks (and a squad or so) following the orange and red arrows but the main British infantry force followed the green arrows. So the infantry actually started with a longer distance to cover to get to the target road than if they had risked the upper section of the map.
Turn One-Two
I suppose I should not be surprised but everything went my opponents way in the British turn. Smoke was dropped on my mortar blocking some attack opportunities and the two armoured cars pushed through the hedges to the South with one going into bypass of my anti-tank rifle squad (ballsy) which hit then failed to destroy it (needed an 8 got a 9; the story of my ASL life). We spent some time in the rule book searching to see if in-hex always counted as a rear shot (giving me an immobilise) but found nothing except overrun (not the same) and the VBM which basically said 'side shot'. The eventual combat needed a 5 or my part,which I also did not get, and a 5 on his - which he got exactly casualty reducing me. In the North a 2 up 1 broke my concealed defending half squad and in the centre, bar one single break, his entire infantry force managed to dance unscathed through all my defensive fire. Things became worse in the centre where after getting a 1 morale check on a squad plus officer I then saw that officer double one his morale check and then both battle harden (to 8-0) and generate a hero. Oh lovely. That squad plus another and both the officer and the hero then merrily dropped into close combat with a single one of mine. Things were looking really bad. As in first turn morale fail bad until, in the only good news in the turn, I managed to kill a squad and hero in combat without losing anything in return!

The German turn was much of a muchness with zero effective shooting and a box cars breaking one of my light machine guns just as the carriers came close. In the combat phase I further casualty reduced the British squad in 1-1 combat and they (again) failed to harm me back.
British Turn Two
Bar the one gleaming light of the central combat things were still looking bad until this turn came along. The Brits were not slow to try to exploit their breakthrough in the South as an armoured car trundled along and parked itself in O5 which was ballsy to say the least. Saying that they did not know I had an anti-tank gun parked right behind it so its resultant destruction was not surprising. I rolled high enough to avoid a blazing wreck though.
Since I was already essentially in 'last chance saloon' all the usual defender tricks of skulking etc were out of play and my boys stood and shot and were effective for a change. A further three! full British front line squads broke with two of them ELRing (which for Brits just makes their range a little bit less) It was enough to break up the central push leaving just two units and the nasty 9-2 standing in the centre by the end. Admittedly one squad will almost certainly be back my next turn and probably another the turn after but it does leave the British low in numbers in the centre and they need infantry in the village clearing the houses of the anti-tank guns. As a final turn bonus I also snake eyed a Morale check and generated my own 8-0 officer who now is perfectly placed to (crossed fingers hopefully) give me a half squad with an anti-tank rifle and a full squad in the village before the British get to move into the area again.

What a difference a turn makes. The central attack suddenly looks lonely, a tank has gone and the Germans are looking far more comfortable.
German Turn two - Turn three
The game had been swingy for luck so far with the first turn heavily favouring the attackers and the second favouring me. Luck now swung back round to the attackers side for turn three and started sneering in my general direction. Beyond the five sniper rolls (needing a 4 on my opponents part) that did not generate one sniper (I may ritually burn my sniper dice if my up and coming dice tower does not generate something equalling equilibrium and yes I do know random result blah,blah, blah). But that was nothing compared to what was coming.
Not all went wrong. This turn was fairly low pressure due to lowered British unit count and even after the British rallied a squad plus light machine gun on the edge of the board I managed to get back a full squad near the lower roadblock as well. Shooting was mostly appalling bar one of the forward British squads routing (straight back to a waiting officer). In the combat I dropped another squad in getting me potentially 2:1 odds (or 4:1 versus a half squad). I went for the half squad and killed it but a snake eyes from the British at 1:2 odds killed a full squad of mine and generated yet another 7-0 leader.

End of German turn two. You can see the gap between the tanks and the infantry increasing
The British turn was interesting. Every phase had important decisions or impacts but this one particularly. For me the Rally phase bought back my broken light machine gun (good) but the anti-tank squad squad failed to rally (needed an 8). The British squad I had broken last turn rolled a double one for its rally and then heat of battled to a 'berserk'.
British prep fire was minimal with only the furthest West carrier shooting.
Now my opponent had recognised that my strongest defence was currently to the left of the village and he decided to prioritise most of his infantry to deal with that location with one squad/light machine gun/8-1 leader moving from the North and the berserk squad and another full squad plus light machine gun in the South. So the 9-2 and two full squads moved North through the orchard to threaten my strongest flank and to potentially clear out the combat. I could not disrupt their advance and my only success in the turn was to stun the second carrier (that's three vehicles I have failed to do anything to by one solitary dice point).
During my defensive fire I had a long look at the potential LOS between my concealed AT gun and the British troops in the building and went for it (there was line of sight) and though the shot was ineffective (and revealed the gun) it has dropped an acquire and made it a less pleasant base for those troops. Elsewhere my medium machine gun did some good and broke (and ELR'd and casualty reduced) one of the Southern British squads. This was really helpful as it made even more British strength focused to the left and away from the right making those tanks even less supported thus generating more time pressure.
In return though the Brits killed my last defender in the melee though I did also manage to take out the last half squad and the second newly created leader (so in total that single combat saw the loss of 2.5 British Squads, a generated hero, a generated 7-0 and a battle hardened OOB officer versus me losing two squads. Considering the balance of forces I probably lost more than I gained but for the fact that by lasting as long as it did it helped hold the extremity of my line and forced my opponent to push considerable amounts of his remaining troops (including the 9-2) to that side to help contain and win it..)

the melee has finally ended and the British have successfully dominated the left flank and is about to dominate it further.
German Turn three
My left flank was looking precarious and I had some key rolls to make. The first (in prep fire) was to shoot point blank the squad/light machine gun/8-1 in the woods into the now free troops from the melee (the 9-2 and a full squad with two bren guns..). I needed to roll low and naturally did not. It was high firepower (14) so did cause a 1 morale check and 'praise to God' the 9-2 failed and though the squad passed they then failed the Leader Loss Task Check and pinned (phew).
Still that was not bad. Then came the defensive fire phase. My leftmost forces absorbed a point blank fire group from the troops next door (hurrah!) but then Chuck Norris appeared in the distance carrying a mortar and things went South fast. The mortar's first shot was a snake eyes (ouch) but the critical hit roll was quite high (an 11 if I remember correctly and only managed to kill the prisoners), it's second shot was an eight but it also rated and the IFT roll of 3 causing a K/2 and my random selection hit both squad and officer. The officer naturally enough failed his wound roll and died and the squad casualty reduced. The next shot taken was another snake eyes (lovely) and this result roll was low enough to kill the squad as well after failing their morale. Thank's Chuck.

British Turn Four
Bar the Brits superb last turn, where luck had swung back in his favour, things were still not looking bad. The British have a definite lack of troops and are very heavily focused around the left meaning their tanks are still (mainly) unsupported. The turns initial phases mainly involved the left most Brits manoeuvring to pressurise my medium machine Gun and take my only really dangerous remaining stack of infantry out of play. The two carriers also emptied themselves of half squad crews taking the Bren guns with them for extra infantry.

Time was running out and as the British player is allowed to lose two tanks (lose three and the game is lost) he decided he had to use his armour to help out by trying to remove my AT Gun out of the game. This is quite a high risk activity with early war tanks. He started by moving the smaller armoured car thing behind my AT Gun and taking (and failing to hit with ) a 10 IFT roll (good grief that thing has a good machine gun on it). I swung my AT Gun round and took an acquire shot (changing two covered arcs IN a building has minimal chances of getting a result). Now one of the A10s was moved to the guns rear where it stopped. Now the intention was clear. The armoured car was a sacrifice (and it 'might' survive) this would give the A10 basically an advance fire phase, defensive fire phase then another prep fire phase of shooting with main armament and machine guns to take out the gun potentially allowing the Northern infantry to hopefully sweep out the (admittedly weak) remaining German opposition (a couple of half squads and one full squad). As you can see though the A10 managed to park and stop right in front of my other hidden AT Gun....These moments are rare in ASL and to happen twice in a game is rarer still. So just pause for a moment and imagine the faces of that AT Guns crew.
I do admit my heart was pumping a bit here as I don't think I have ever had such favourable chances at winning a game almost instantly but as its ASL it could still go badly wrong. For my defensive fire phase I went with 'other' rolls first (and I am really glad I did). I shot my medium machine gun at the Northern British forces and managed a box cars thus breaking my best weapon.

I then revealed the AT Gun and took the shot. The first shot missed (10 base -2 moved, +2 point blank so needed an eight) but it rated so I could shoot again with the second hitting. The odds of killing were good. A 37L is 9 base +1 for point blank and +1 for rear target facing so 11 minus 3 for the armour gave a very possible 8. I rolled a 5 and the tank was gone. This made the entire game dependant on the other tank which had paper armour and was sitting next door to an AT Gun which had it acquired. We moved through the rally phase quickly (the 9-2 rallied as expected, I tried to fix the medium machine gun and found it was totally broken so removed it) and went straight to German turn 4 prep. If my heart was beating fast then it was worse now (point to note, when under pressure things can slip. For example we made two mistakes with these two tank kills that as it happened did not affect things but could have. The first was that we did not include the armour in the Tokill roll of the A10 kill (added above) so though the tank still died it would not have been a burning wreck and a crew survival roll could be made. Since we got that wrong and said it was a burning wreck we should also have added smoke and since there was a mild breeze that smoke should have drifted over the second tank making my shot harder). Anyway back to the roll. The base tohit was 10, modified tohit was also 10, the DRM were -1 acquire, -2 point blank range, +1 small (and it should have had +2 smoke as we had misplayed the kill before). The roll was an 8 and it was a hit but with no rate (I was now automatically considering carrying out an intensive fire shot). The ToKill was impressive though 9 base +1 range -0 (this armour car has not got the best armour) and with a 4 it exploded (and was a blazing wreck). The Game was won. Pheeeeeeewwww what an ending and what Topsy turvey game
In one of fury's better scenes we see the tanks, heavily supported, moving into a town here and encountering an at-gun https://www.youtube.com/watch?v=CdQ2mUo3jy4

the end shot and a heap of burning tanks. The upper blaze is incorrect as it happens but the lower is not.
Conclusion
The game actually ended (through no fault of my opponent) with a decent demonstration of early British infantry/armour co-operation failings with the armour going off on its own without infantry and getting punished for it. I should note that this was the Royal Tank Regiment and it was the cavalry regiments famed for charging off doing their own thing whilst they tended to look down on the RTR as 'mechanics' so wrong regiment but interesting tactical demonstration anyway. It also historically matched the defensive tactic of shooting/holding back the infantry and ignoring the tanks (well almost ignoring) to allow the AT Guns to deal with them which was also quite common so it was nice from that point of view.
The game was all over the place luck wise and several of the turns started with me or my opponent staring at the board for ten minutes desperately trying to work out what were the options and what we had to do to advance our own win condition. In the end I was lucky and my opponent was forced into a risky strategy because of the delay to the infantry.
The scenario conditions do make things more difficult for the Brits as one approach is a more slow and steady advance to sweep the Germans out but one which keeps the tanks back and uses them more for fire support (lots of decent machine guns) with maybe the more expandable carriers trying to go behind lines to cut rout paths etc. Lots of VBM seems inadvisable and you really need infantry close by to search/deal with two HIP AT-Guns.
Good fun and I would recommend.


Nice AAR. Will have to put this scenario in the rotation.
ReplyDeleteIt does have a lot of action fast and that nice balance of conflicting needs for the attacker
ReplyDelete