A94 - Bofors Bashing

Another re-post from August 2014 this was a game against my Czech opponent. He was somewhat resistant to moving along to tanks but was willing to play around with small artillery and different sorts of infantry scenarios.
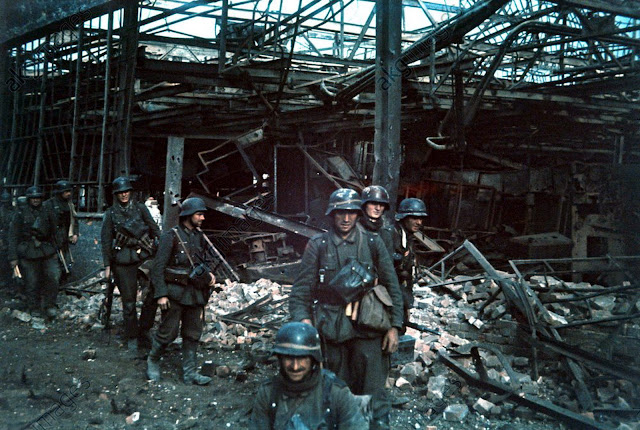
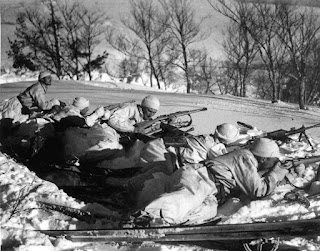
Next up we took on this glider based action on Crete. A strong force of entrenched New Zealanders has to defend some AA guns against some glider arriving elite Germans. As with most Glider scenarios the orbat varies dependent on how many actually land safely and the the glider player has to decide whether safety or speed is important in deciding on how risky the targeted landing zones actually are.
My opponent wanted artillery practice so I took the Germans and promptly took a risk trying to pressure the kiwis in the north which did not pay off. I also possibly spread my gliders out to much in an attempt to gain safe landings causing my troops to be very spread out and unable to concentrate.

Setup. Glider placement top left (North) turned out to be unfortunate
Initial AA fire at gliders was painful with multiple rates. One glider was blown up with a 4-6-8 and mortar on board (ouch) whilst another was damaged in the air then evaded into some olive trees and crashed on landing losing a 4-6-8 and even worse my 8-0 officer. A final glider was also damaged but evaded to an empty hex and just lost a half squad.
The NZ shooting was scarily accurate over the first two turns as I endeavoured to get my Fallschirmjäger forward with my only squad in the north going fanatic then breaking with another breaking in the east due to the AA guns multiple rating a lot. There was a lot of hit, crit and rate and my only saving grace was that he tended to roll higher on the damage roll. Still be the end of turn two I had lost another squad to mortar/anti-aircraft fire and not rallied my other two brokies. I had not realised how dangerous a high rating gun with a good IFT shot can be. Plus both of us managed snake eyes mortar hits. His hit a squad broken by a gun which was followed by a 4 enough to casualty reduce and cause an mc2 which the remaining squad failed wiping out both. Mine was on his mortar squad which just broke – fortunately leaving the bloody thing behind. My one saving grace was that one of the AA guns on N6 malfunctioned reducing the amount of fire and hopefully allowing me to launch an assault over the next two turns. I will need some luck to crack this defence. I will try for the south most gun next turn by attempting smoke in M7 and N6 (needing 9’s and rate) with one of my west troops hopefully distracting the mortar – this may allow my officer and squad next to the broken gun perhaps allowing us to take it in combat.

The black acquired gun has malfunctioned as the visible 9-1 officer to the left is about to attack covered by smoke.
My plan was reasonable unfortunately the kiwis put a stop to it. A lucky +3 shot past the smoke pinned the squad with officer that was hoping to engage the gun and then a wind roll pushed the wind up to heavy and wiped all the smoke out. From successfully using my mortar to successfully laying dispersed smoke I now had no cover at all. Continuing I managed to wipe out the first guns crew and officer (bit of a waste really as the gun had already malfunctioned off the board) but in another dragging combat I moved my 9-1 officer in but failed to kill the enemy. He rolled a double one causing colonel blimp (6+1) to arrive additionally managing to kill a full squad and officer.

The visible melee would go badly wrong for the German forces.
On the left a squad and half squad went down to artillery fire before a hero was generated in my final squad. With time disappearing I had to run it across open ground and the hero was first wounded then killed with the squad then pinning. The enemy sniper here proved efficient killing my 8-1 officer with a head shot then breaking a pinned squad near the col blimp combat.

There is not much more to say really. I had nicely surrounded the kiwis so that any breaks would cause surrenders or destruction but could not break anyone. The strong point at L5 was particularly stubborn and it eventually took a critical to break (just ) the officer. At this point I had 5 squads and one 7-0 officer left versus 2 guns and 9 squads, 2 -1 officers 1 8-0 officer and the 6+1 along with 2 mortars, plus the kiwis had broken my encirclement so were no longer under threat of rout destruction. I still had two turns but they would be a suicidal two turns to win (still possible perhaps) since we were stopping for the week I decided to concede as it would be a waste of a gaming night to continue.

Almost the end, all the forces to the bottom of the map are about to be destroyed or routed.
This is quite a fun scenario. If playing again I might even risk dropping all the gliders onto the airfield itself using the dust as cover as this allows far more aggressive play but would be a very much lose it first turn or win first turn approach. The mortars are key to a German victory (that and the wind not moving too heavy) as the paratroopers really need smoke to crack open the new Zealander defence. My landing locations were not that bad and the ability to encircle the New Zealander position useful. My plan execution did not go that well though. Would play again.

Comments
Post a Comment