LC8 - Former Allies

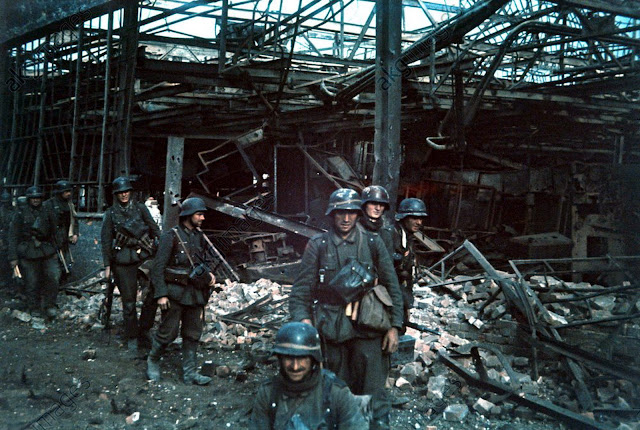
My next skype-with-boards (SWB?) game is in Lone Canuck’s scenario #8 from their Prince Eugen Pack. Here a force of scummier SS from the ‘7th SS Volunteer Mountain Prince Eugen Division’ along with a detachment of Assault Guns, is being launched against a bridge defended by Bulgarians mainly armed and equipped with German uniforms and weapons. No one expects much honour from Waffen SS formations and this particular unit seems as unpleasant as standard. Originally formed from ethnic Germans in Yugoslavia it had the unusual distinction of not finding enough volunteers so ended up being manned by conscripted ethnic Germans from the region. This might seem to cause the unit to temper the SS’s standard zeal for atrocity but apparently did not. As with most Waffen SS troops these were thoroughly unpleasant to encounter. As the following report indicates of one action
Everything they came across they burnt down, they murdered and pillaged. The officers and men of the SS division Prinz Eugen committed crimes of an outrageous cruelty on this occasion. The victims were shot, slaughtered and tortured, or burnt to death in burning houses. Where a victim was found not in his house but on the road or in the fields some distance away, he was murdered and burnt there. Infants with their mothers, pregnant women and frail old people were also murdered. In short, every civilian met with by these troops in these villages was murdered. In many cases, whole families who, not expecting such treatment or lacking the time for escape, had remained quietly in their homes were annihilated and murdered. Whole families were thrown into burning houses in many cases and thus burnt. It has been established from the investigations entered upon that 121 persons, mostly women, and including 30 persons aged 60–92 years and 29 children of ages ranging from 6 months to 14 years, were executed on this occasion in the horrible manner narrated above. The villages [and then follows the list of the villages] were burnt down and razed to the ground. ”
— Dr. Dušan Nedeljković, Yugoslav State Commission, Document D-940
— Dr. Dušan Nedeljković, Yugoslav State Commission, Document D-940
Anyway, either way, these were sent in 1944 to seize a town/bridge from the recently defected Bulgarian army. Now the Bulgarians might win the award as ‘least convinced AXIS allies’ and managed to avoid getting their troops involved in anything of real note beyond patrolling the rear areas of the various armies and anti-partisan work yet at the same time grabbing lots of decent gear for their four to five hundred thousand strong army. When they got the chance they changed sides and their movement forward in support of the Soviets resulted in the action portrayed here.

The scenario has some unusual conditions. Firstly the defenders heavily outnumber the attackers plus have a SAN of four versus the attackers two…The reason here is that the dual victory conditions allow for two objectives. The first is a suicidal attack on the bridge (its destruction ‘wins’ the game for the SS) and the second is a numbers game. If the Germans can outnumber the Bulgarians in the bridge map at the end of the game then they win.
I have taken the Bulgarians and some interesting setup decisions. I have two 50L anti-tank guns and a HIP squad to use. The Heavy Machine gun is being situated according to the heavy hint from the scenario and will sit in the level three steeple where it will possess excellent firing opportunities. The firing unit has been split in two to provide some sniper cover (though with a SAN of two I don’t expect too much sniper threat) along with my best officer.

Setup, the Spire is the heavily stacked hex at the rear left, finish HIP for the guns and Japanese HIP for the boresight
The two anti-tank guns are situated to cover the approach to the bridge with the hip doing the same (hopefully) for the other side. The rest of my forces are looking to strongly defend the mid-line. I do intend to fall back but expect several squads to be sacrificed to allow the rest to do so.
The First Half
The Germans executed an almost perfect assault using the Stugs heavily for smoke and armoured assaults and bar a couple of soon rallied breaks managed to get to the initial defence line helped by no less than four ‘snake eyes’ in the first few turns (versus 1 box car) including a good Stug shot which hit a concealed squad with a 3 then managed to snake eyes the damage roll evaporating one of my squads . After this things got a little muckier. The SS were throwing themselves into combat (and usually winning) but the valiant Bulgarian defenders did manage to delay a couple of combats. In one notable combat a German full squad attacked one of my Bulgarians and managed to get casualty reduced. Needing to move forward the SS came up with the novel approach of throwing a DC into the combat. Naturally the Bulgarians broke and the SS survived unscratched though the now broken Bulgarians did manage to withdraw from the combat – probably due to the Germans ears ringing from the explosion still…

The SS assault crumples the initial Bulgarian line helped by a lot of Stug smoke
The assault guns were proving irritating and I was soon struck by the feeling that my anti-tank guns were too far back but by mid game two had run out of smoke. If it was not for my excellent heavy machine gun then we would have lost very quickly. That though was a rating demon through turns two and three and though it only managed to break one squad a passed morale caused the sniper to wound the German 8-1 and its general high level of threat (and visibility) caused the Germans to adjust their approach to avoid it. At one point one of the Stugs chucked smoke successfully at the steeple only for me to realize that smoke only rises to level 2 and thus the gun was still completely free to shoot up the battlefield (plus it stopped the Stug doing anything more dangerous, a rare mistake by my oppo). My luck did not last though and the next turn the same Stug blasted the steeple with HE and both half squad and officer broke, my ‘spare’ half squad on the ground floor then failed to pick it up so allowing the Germans much more freedom to press forward.
A final smoke attempt caused a Stug to malfunction its main armament and lose smoke so all have now lost smoke.

We now stopped for the week and I have to be careful next week with how I continue. The Germans need to kill (or destabilize) more of my squads than him and currently I have 9 squads versus his six the problem being trhee of mine are at considerable risk. I also need to get my line back to allow the 50Ls to get involved. Since crew do not count for the victory conditions these are essentially throw away units (and yes they were too far back). One advantage is the victory conditions state ‘good order’ for both so if the Germans charge into close combat AND fail to kill me (and me them, not a good guarantee to hang my hat on) then neither would count.
So my plan (in exhaustive detail) is as follows,
I9 can bypass H8 to the East then into G8 then F7 (end target square next to the hidden 50L in F6)
J8 can move to I9 (the bypass would allow shot at 6 down 2 whereas the move only allows a snap at 2 flat) then if still alive bypass H8 then into G8 (end target square H7) – the officer could then carry on to reach H5
W9 can try to dash across the road to J8
M8 can cx and bypass behind the row block then move along the river – end target H5 (this is risky

This leaves the concealed squad in L9 who will hopefully suck up the 4+2 shots coming its way and remain concealed. My other potential trick is the HIP squad, my hope is that by abandoning the row block my oppo might be tempted to bypass the row block to the East so that he could reach K6 in his next turn, this would allow a 6 down 2 shot which may be lucky..
Numbers wise this would give me 6 squads at the Alamo location with three squads sacrificing themselves to hopefully delay the Germans a turn and do some damage (the damage is key as if I can knock of one more German squad then I will feel a lot happier). If my broken squad in EE10 self rallies (I am tempted to run an officer there on my next turn ) it might give me an extra squad or more likely attract a Stug. Equally I really need my 9-1 to rally and get back up the steeple..This could go badly wrong for either player so it will be interesting to see how it plays out.
Game Resumption
On my turn I followed my prepared play book but failed to rally the broken squad and the stupid bloody half squad also failed again to pick up the Heavy Machine Gun (he eventually succeeded in the movement phase when the officer arrived) and then basically ran back all but the two forward squads and the HIP squad. My biggest mistake was pulling my big dummy stack back – I did not notice a line of sight from the medium machine gun armed Germans and the entire stack disappeared. To make things worse I then ran over my 7-0 officer and he was promptly broken and ELR’d to a 6+1 (plus next turn he box carred his rally attempt so became that most magnificent of things – a broken 5+2 ). My forward concealed squad also was revealed in defensive fire with a pin.

My turn 5 ended with most of my boys scuttling back (6 squads worth) and three to delay the Germans
That was not so bad but the next German turn was quite nasty. The Stugs became very aggressive. The broken main gun one went Crew Exposed and trundled up to re-dm my broken squad on the border (unfortunately I think i had drawn attention to it by running the officer over) , the next Stug bypass froze my squad in a stone building (which pinned its PAATC) and the final Stug repeated the trick for one of my reserve squads (which also failed its PAATC). To cap it all one of the SS Assault engineers only moved next to my HIP squad and then advanced in causing combat! disaster… Considering all my forward units were now engaged things were looking rough. My other westerly squad missed the next door Stug twice with Panzerfaust shots then a final protective fire shot from my ex concealed squad boxcar’ed that squad down to a broken half squad – the SS being the SS they issued no quarter and massacred them where they stood. Now it was the combats and here the Germans proved strangely inept. No ambush occurred and both combats resulted in no win for either side and degenerated into common melees. I was not particularly happy as the odds were still against me. The final combat was the street fight versus the bypassed Stug. Though i did not win I did manage to immobilize it which *should* help next turn.

The end of German turn six. I was not confident about the two melees to the right and was slightly
concerned about my squad at the bottom taking a lucky shot and breaking.
concerned about my squad at the bottom taking a lucky shot and breaking.
Anyway My turn six now began with my second panzerfaust shot in the West actually working!! woohoo a Stug brewed up in flames and I was spared a crew running round. This saved that flank from German pressure. That was it really. I tried shooting into the biggest combat with my heavy and failed to do anything to either side with a 1MC and then the dreaded melees rolled round. The biggest one resulted, unsurprisingly, in the death of my gallant squad but the ex-HIP squad carried on fighting valiantly and that melee rolled over to the next turn!
Here, I think, I was quite lucky. The German Turn seven was subdued and it was mainly subdued because my oppo had miscounted the dummies (I think he hadn’t remembered the big dummy stack going and he thought I had one squad less than I actually had). Therefore he just tried to reinforce the melee with a half squad. Everyone else kept out of the way to hide from the Heavy Machine Gun. Well everybody except the last free Stug which wandered forward to lay smoke allowing me to actually reveal and shoot one of my anti-tank guns!. It ‘broke’ first shot.
The melees though were something else. The squad fighting the immobilized Stug destroyed it (woo hoo) and the valiant ex-HIP squad survived AND killed the half squad that had reinforced.
Final turn was a lesson in failures. I failed to rally the broken squad in the west then fixed the gun! then shot once, hit, dud, intensive fired, missed by one. Nice. Everyone else scuttled out of sight as I believed I still had the numbers. This left the melee and the final dice rolls caused – a draw! both of us ‘failed’ no one died so both squads would not be counted as good order.

Just prior to my turn seven.
The end result was : Germans five and a half squads versus the Hungarians with six. If that assault engineer had won that melee then the Germans would have had six and a half and won!. That was really, really close and an enjoyable game.
I really over thought and mucked up my anti-tank gun placement probably as a result of a recent Finnish game where they had been in the middle of the line and done nothing. Here to keep them until the end I placed them close to the bridge and nothing really got close. Live and learn even though I almost managed the triple of a close combat kill, panzerfaust kill and anti-tank kill in the same game.

Da boys celebrate and my that is appalling tank camouflage. What is it ‘one’ tree?

Comments
Post a Comment